Tone & luminance
Three options on renderImage shape the greyscale signal before it hits threshold or dither:
autoLevels— stretch the input's tonal range to fill[0, 1]. Best for low-contrast scans.gamma— pow-curve the midtones. Best as a per-printer darkness calibration knob.luminanceWeights— choose how RGB collapses into greyscale. Mostly defaults work; useful when you specifically want to read one channel.
These run in pipeline order: luminance(weights) → autoLevels → gamma → threshold | dither. See pipeline order for the full sequence.
autoLevels — fix flat scans
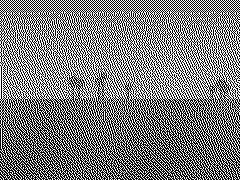
Old or poorly-exposed scans often live in a narrow tonal band — say [80, 160] instead of [0, 255]. Hard threshold at 128 collapses them into mush; dither produces a flat grey field. autoLevels: true rescales the input so the darkest pixel becomes 0 and the brightest becomes 1, restoring the contrast the dither method needs to do its job.
renderImage(rgba, { dither: 'floyd-steinberg', autoLevels: true });
autoLevels is the single best knob for an "auto-enhance" toggle in a UI. It's a no-op on flat (single-value) inputs, so you can leave it on by default if your inputs vary in quality.
gamma — per-printer calibration
Different thermal heads (and different tape types) "burn darker" or "burn lighter" than the bitmap suggests. gamma lets you compensate without re-rendering source artwork: shift midtones up or down with a single number.
gamma < 1brightens midtones (use when the printer comes out too dark)gamma > 1darkens midtones (use when the printer comes out too light)gamma === 1is a no-op (the default)
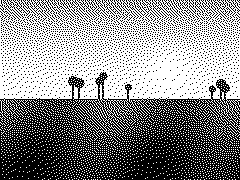
renderImage(rgba, { dither: 'floyd-steinberg', gamma: 0.85 });The sweep below holds dither method constant (floyd-steinberg) and varies only gamma:
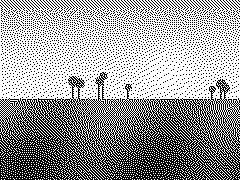

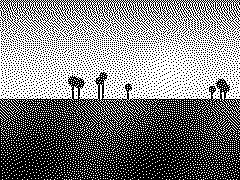
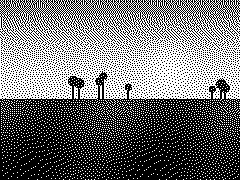
Calibrate once per printer model — tweak gamma until a known mid-grey test pattern prints the way you want, then bake it into your driver's defaults.
luminanceWeights — RGB → greyscale
By default, renderImage collapses RGB to luminance using the BT.709 weights (0.2126, 0.7152, 0.0722) — the modern HDTV standard, and the right answer for the vast majority of inputs.
Two reasons you might override:
'bt601'— the older NTSC weights (0.299,0.587,0.114). Match if you're feeding the lib output from a legacy pipeline that already used these.- Custom tuple — read a single channel by passing
[1, 0, 0](red),[0, 1, 0](green), or[0, 0, 1](blue). Useful when one channel of a colour image carries the signal you actually want to print (a red watermark, a blue blueprint, etc.).
renderImage(rgba, { luminanceWeights: 'bt601' });
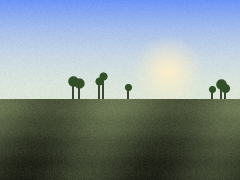
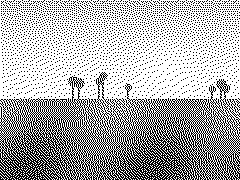
renderImage(rgba, { luminanceWeights: [1, 0, 0] }); // red channel onlyThe grid below uses a multi-colour design — sun, mountain, river, logo text — to make the differences visible:
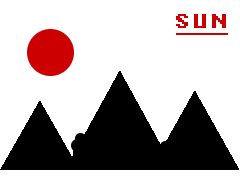

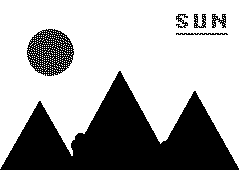
![[1, 0, 0] — red only](/bitmap/images/tone/weights/red-only.png)
![[0, 1, 0] — green only](/bitmap/images/tone/weights/green-only.png)
Note how the red sun and red text are darker under BT.709 than BT.601 (red weighs less in BT.709), and how the red-only weights make those elements pop while everything else fades to white. The blue river goes the opposite way.
Custom tuples must be non-negative and sum to ~1.0 (validated, ±1e-6 tolerance). Asymmetric weights are a niche power-user knob — if you don't know you need them, you don't.
Combining the knobs
These options compose. A common "auto-enhance + calibrate" recipe:
renderImage(rgba, {
  dither: 'floyd-steinberg',
  autoLevels: true,    // stretch contrast
  gamma: 0.9,          // compensate for a printer that runs dark
});
Since autoLevels runs before gamma, the contrast restoration happens first; gamma then re-shapes midtones in the now-stretched range. That order matches how most photo-editing tools work.
Playground
Code snippet
renderImage(rgba, {
  dither: 'floyd-steinberg',
});